- The Ultimate Guide to Finding the Best Robot Vacuum for Dog Hair - June 2, 2024
- How to Make Your Home Smart: A Comprehensive Guide - May 28, 2024
- How to Make Your Home a Smart Home: A Comprehensive Guide - May 26, 2024
When you’re editing a video or presentation in Canvas editor, chances are that you want to add music or a voice over to your design. In this article, I’ll explain how to add music to Canva to optimize your project.
Three ways exist to add music to Canva: Make use of Canva’s audio library including an endless choice of different tracks, upload your own music, or record your own voice and add it as a voice over.
In this guide, I break down the individual steps for each method about how to add music to Canva.
How to add music to Canva?
- Use Canvas audio library
- Add and select the Audio tab
- Choose a track
- Add the track to your project
- Upload your own music
- Upload the audio file
- Add the audio file to your project
- Record your own voice
- Click on ‘Record yourself’
- Record your voice over
- Add the voice over to your project
Let’s take a closer look at the steps.
1. Use Canvas audio library
1.1. Add and select the Audio tab
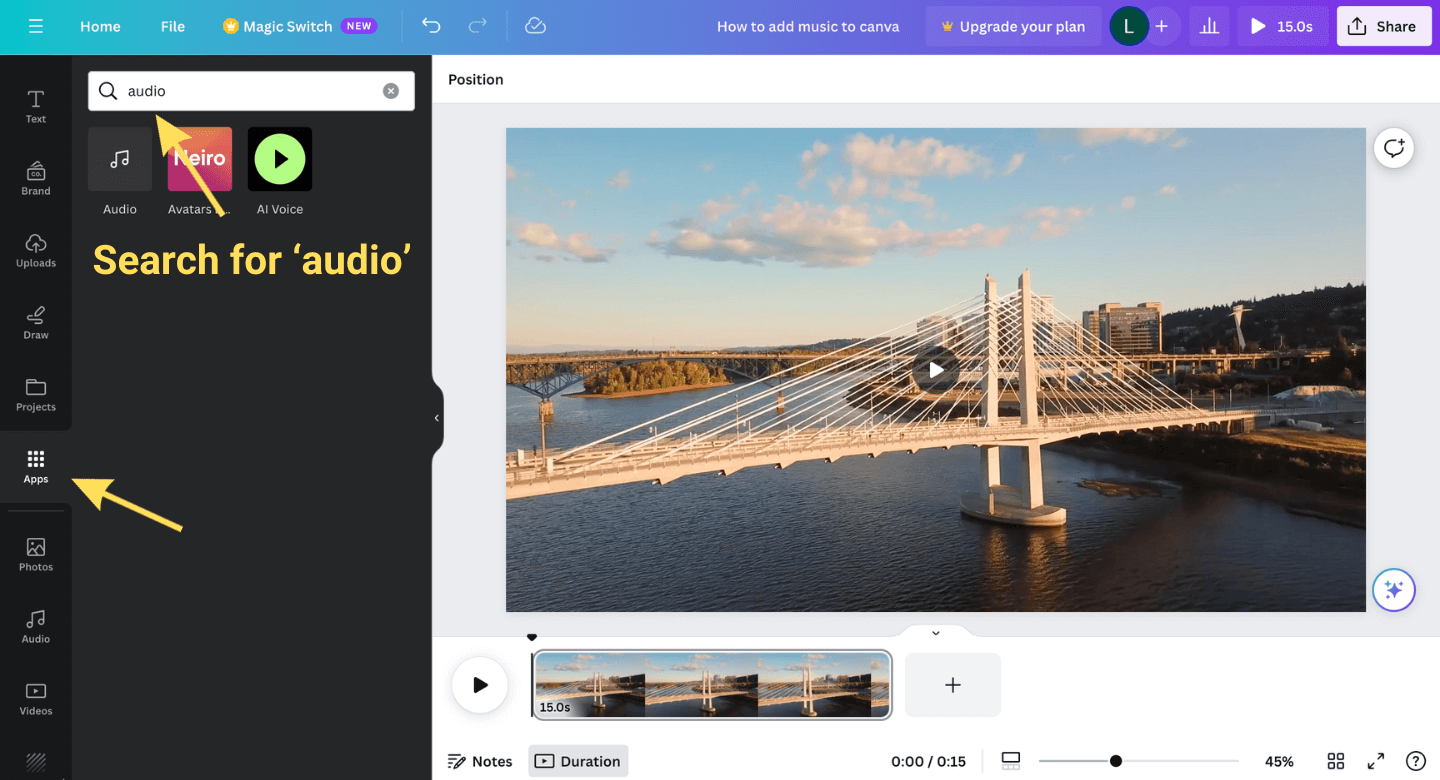
First, go to Apps and type in the search bar ‘audio’. Click ‘audio’ and the tab now appears in your toolbar.
Click on ‘Audio’ in your toolbar to open Canva’s audio library.

1.2 Choose a track
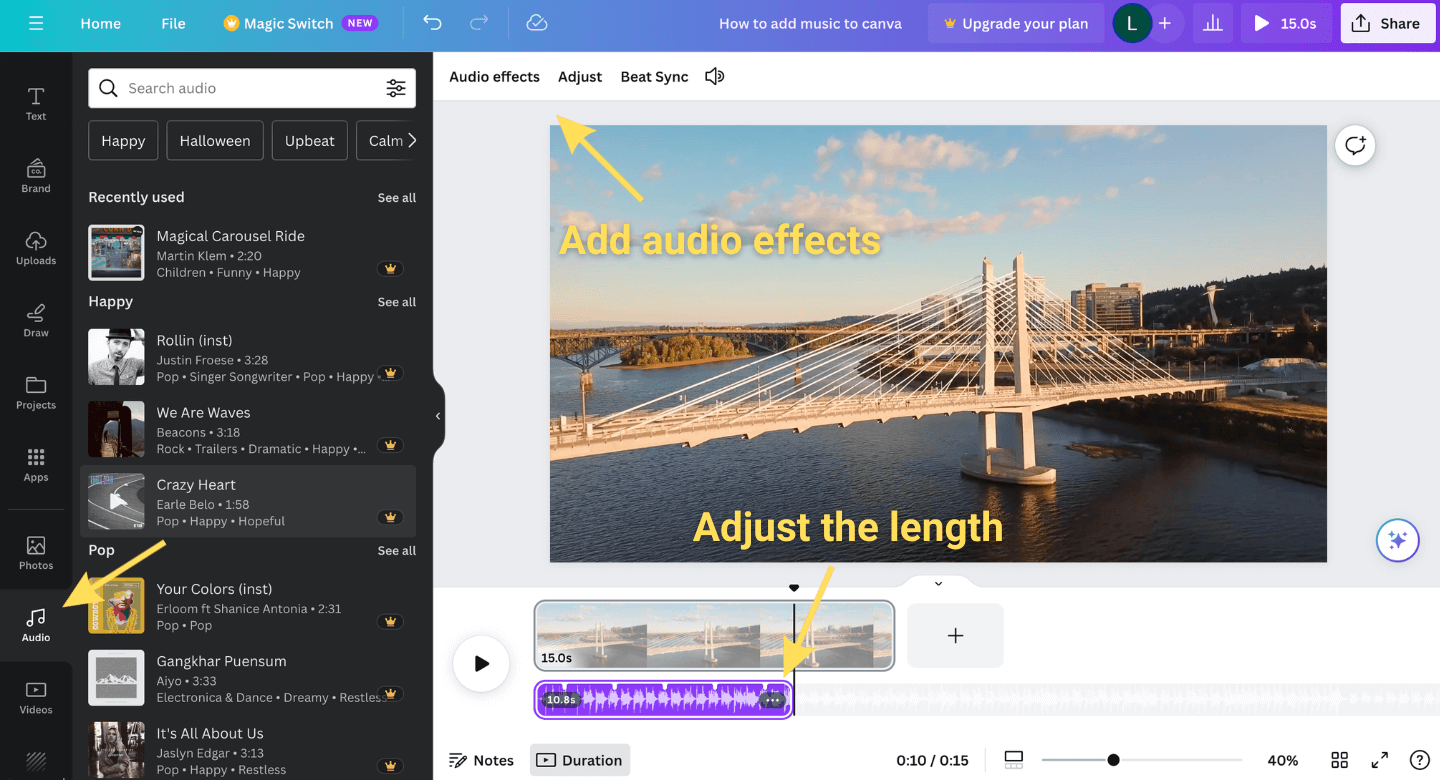
Browse through the library and select the track that you would like to add to your project. Note that most of the tracks are only available for the Canva Pro account.
Luckily, uploading your own music is free. I’ll discuss these steps later in this article.
1.3 Add the track to your project
Select the track and add it to your project. As you can see in my example, the track is added below my video.
Adjust the length of the track and add audio effects so that it fits your project perfectly.

2. Upload your own music
This is the second option about how to add music to Canva. The great thing is that this method is free!
2.1 Upload the audio file
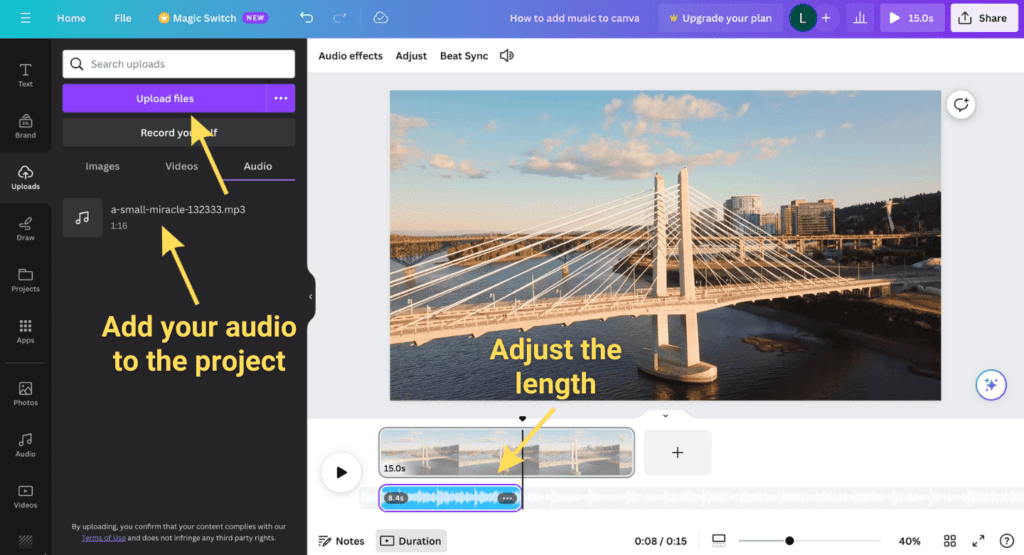
Download royalty-free music from for example Pixabay to your computer. Then, go to Canvas editor to ‘Uploads’ and upload the music file.
I searched on Pixabay for a ‘happy song’, downloaded it to my laptop, and then uploaded the file to Canva.
2.2 Add the audio file to your project
Select the audio file and you’ll see that it has been added below your video or presentation. Again, adjust the length and add audio effects and your project is ready to go!

3. Record your own voice
Use this method if you want to add a voice over to your project. This might be handy if you pre-record a presentation that you’ll send out digitally.
3.1 Click on ‘Record yourself’
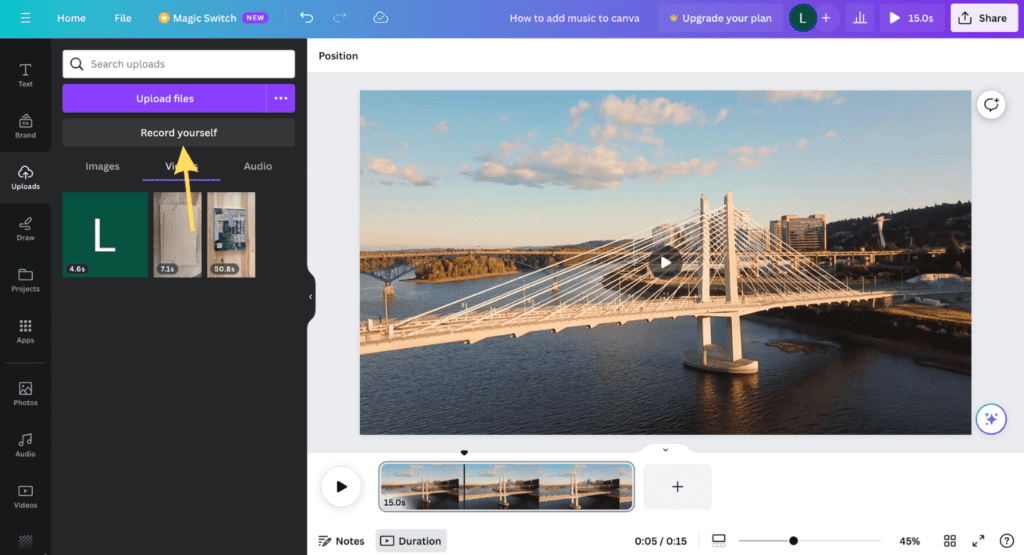
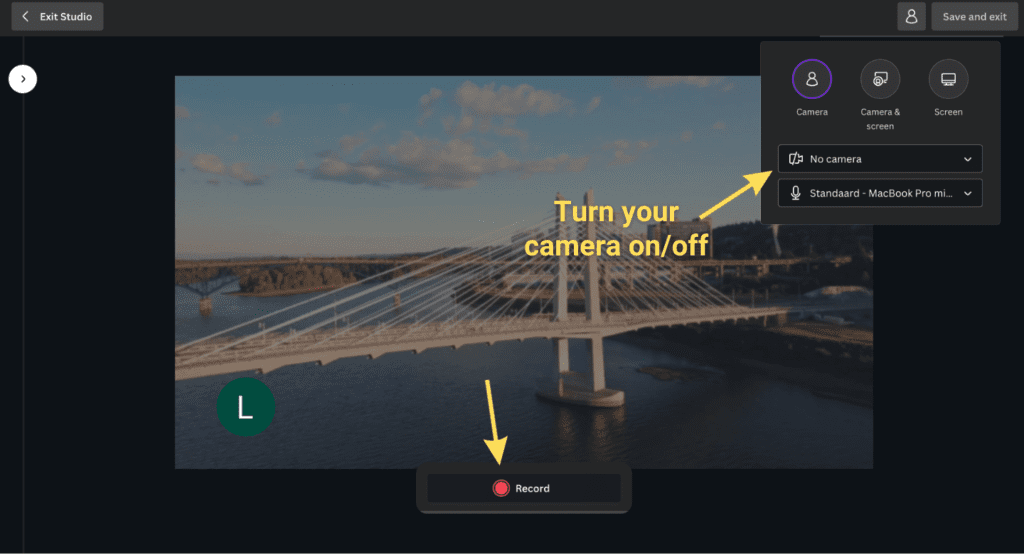
Go into Canvas editor to ‘Uploads’. Then, click on ‘Record yourself’.

3.2 Record your voice over
In the top right corner, select if you want to turn your camera on or off. Hit record at the bottom of the screen and record your voice over.
Once you’re done, click at the top right Save and exit.

3.3 Add the voice over to your project
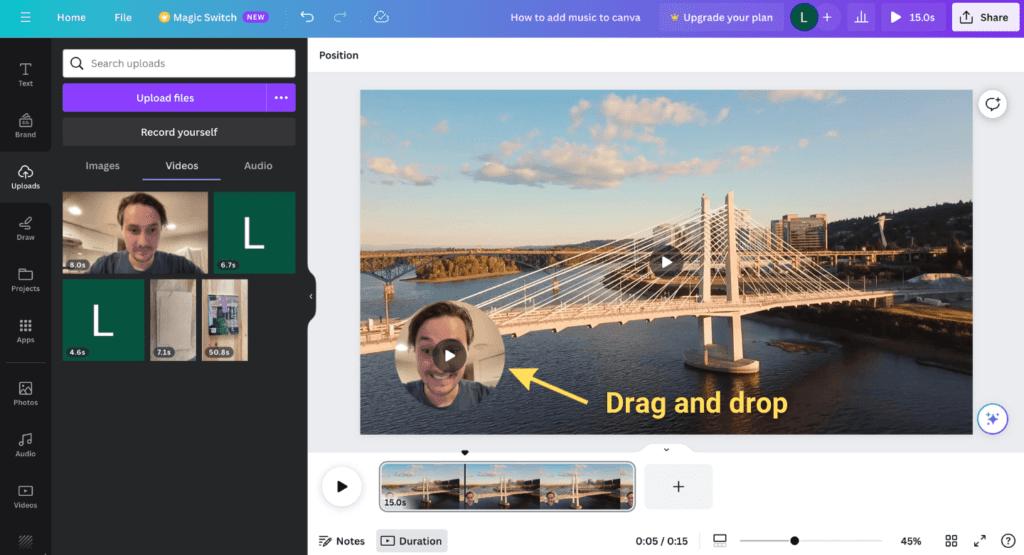
The voice over has been added to your project. As you can see, the voice over has been added within your project.
In my example, I turned my camera on during the voice over. Your face will then be shown and this is great for an online presentation or YouTube video. People then see your face when you talk them through your video or presentation.
Drag and drop your voice over where you want and you’re done!

Summary – How to add music to Canva
In this guide, I explained how to add music to Canva. There are three ways to do this: Make use of Canva’s audio library, add your own music, or record your own voice over within Canva’s editor.
I hope this article helped you, so you can add great audio to the project you’re working on!
If you’re interested in Canvas capabilities regarding AI and text-to-image generators, please click here to read the article in which I tested this new feature.
