- The Ultimate Guide to Finding the Best Robot Vacuum for Dog Hair - June 2, 2024
- How to Make Your Home Smart: A Comprehensive Guide - May 28, 2024
- How to Make Your Home a Smart Home: A Comprehensive Guide - May 26, 2024
Whether you’re creating an advertisement, product demo video, or e-learning course, most of the time you need a voice that gives an explanation. In the past, you had to use your own voice or hire an actor.
Nowadays, it’s possible to generate a voice with AI. In this guide, I’ll explain in simple steps how to make an AI voice with Murf.ai.
Because of its user-friendly dashboard and the AI voice that sounds like a real human, Murf.ai is in my opinion one of the best AI voice generator tools out there.
Let’s dive into the steps.
How to make an AI voice?
- Choose and sign up for an AI voice generator tool
- Create a new project
- Import your script or own voice recording
- Select your AI voice, language, and tone of voice
- Add theme music and sound effects
- Check your timeline and export the voiceover
1. Choose and sign up for an AI voice generator tool
In this guide, we’ll take Murf.ai as an example. Go to Murf.ai and sign up in the top right corner.
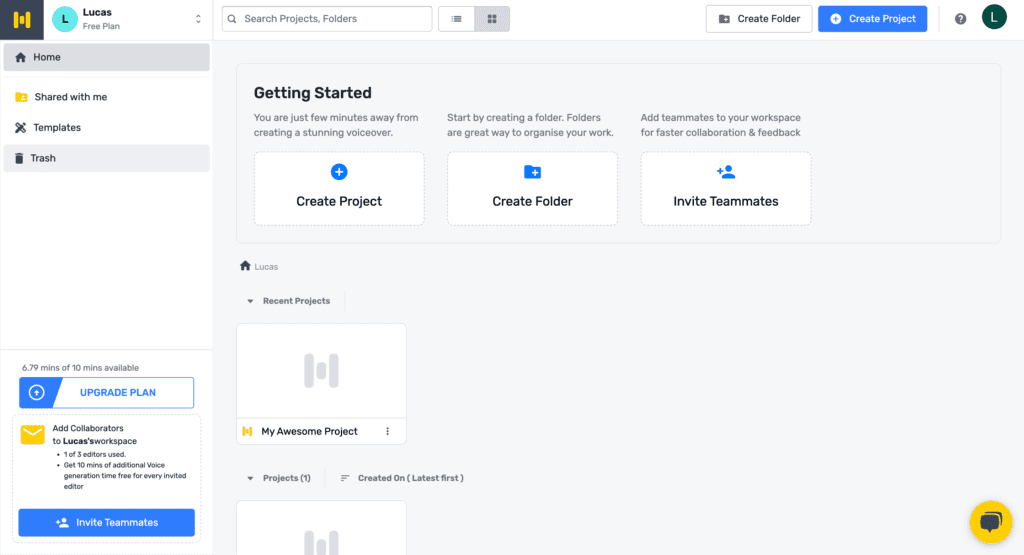
As soon as you sign up, you’ll be directed to the dashboard.
2. Create a new project
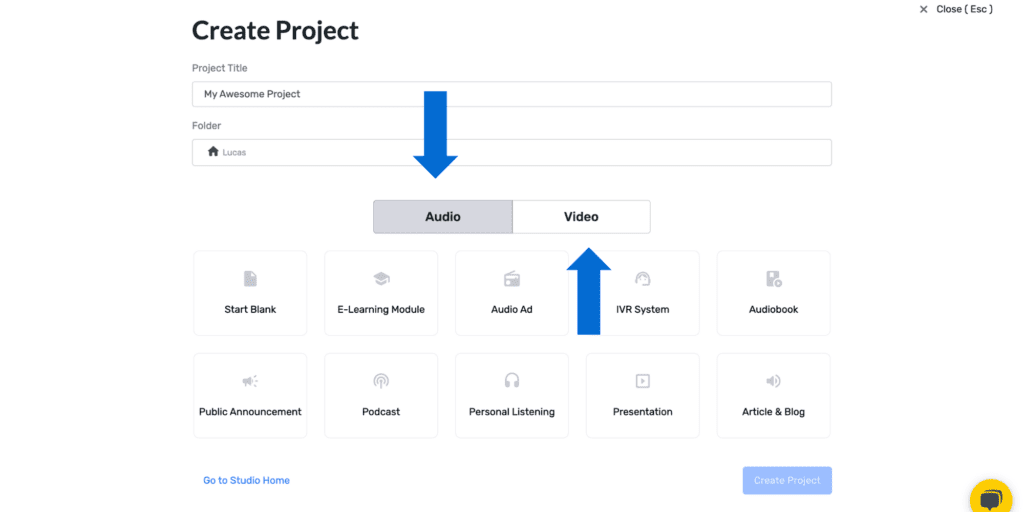
In the dashboard, click on ‘Create a new project’. Give your project a name and select what you want as output: Audio or video.
3. Import your script or own voice recording
In this step, you have the option to import your script from a document (.txt, .docx, or .srt) or upload your own audio file (.mp3, or .mp4). Or you can write your text line by line.
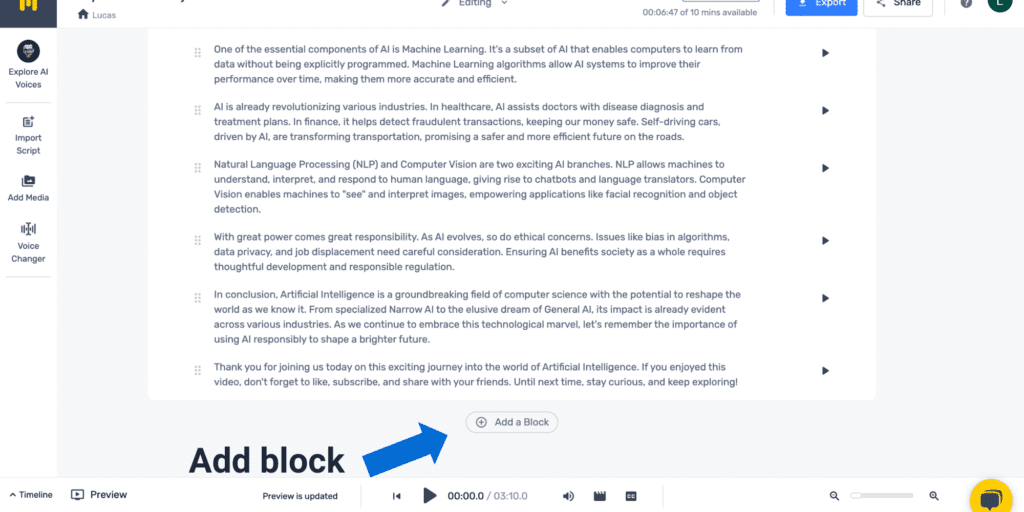
In my example, I generated a video script about ‘What is artificial intelligence?’ by ChatGPT. I copied the text and plugged it into Murf.ai.
If you have a voice recording, then click on ‘Voice changer’ in the left side menu. Select your audio file and Murf.ai converts it to studio-quality sound.
In the editor, it’s easy to add new paragraphs or switch them around with the drag-and-drop functionality. To add a new paragraph, scroll down and hit ‘Add new block’.
4. Select your AI voice, language, and tone of voice
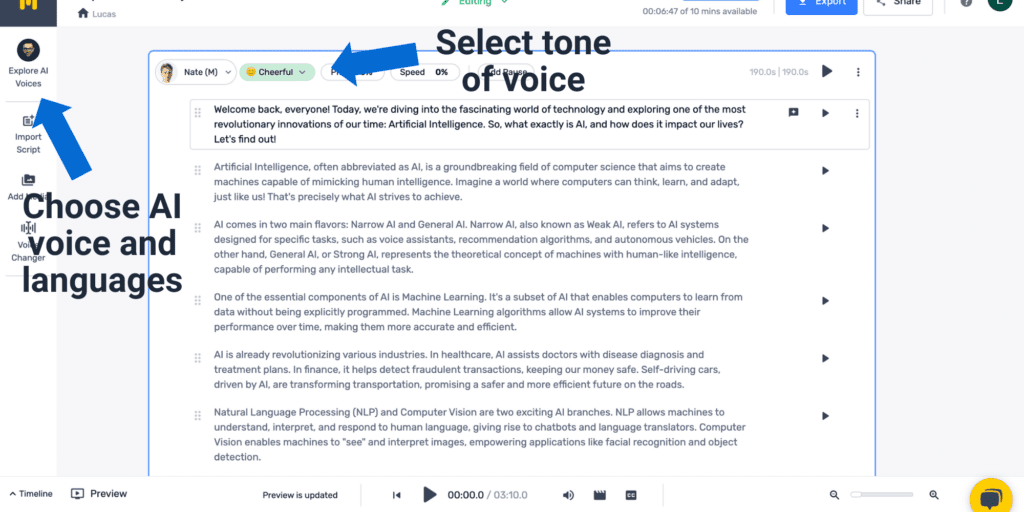
Now you have your script ready, it’s time to select the AI voice you like. You can choose your voice based on the type of person you need, such as an educator, corporate coach, animator, or author.
There are more than 120 voices to choose from in more than 20 languages. English, Japanese, and Dutch, it’s all in Murf.ai.
The last thing to do is to select the tone of voice. Need a very happy and exciting voice? Then select for example Cheerful or Excited. Or do you need a bit more serious voice for your video? Then probably go with General or Newscast.
5. Add theme music and sound effects
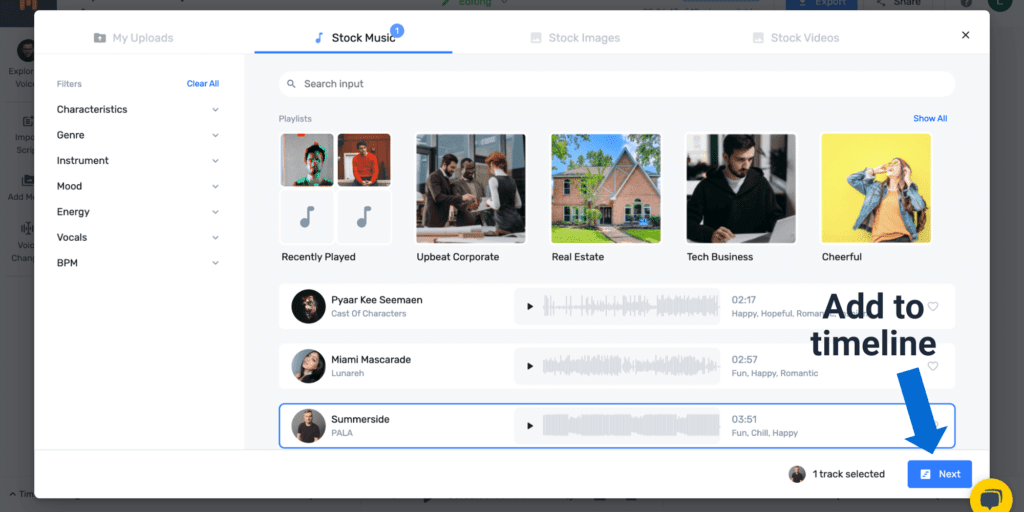
Murf.ai has a library where you can choose stock music, stock images, and stock videos. The stock music is especially useful to spice up your voiceover.
For the stock music, you can filter by characteristics, genre, instrument, mood, energy, and vocals. Select the stock music you would like and add it to your timeline.
6. Check your timeline and export the voiceover
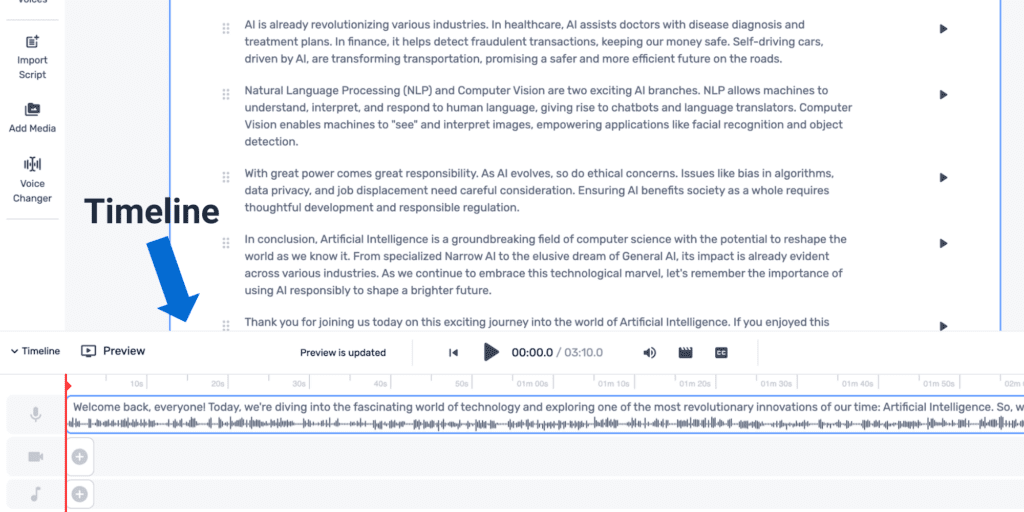
Now your AI voice is almost done. It’s wise to check if everything is set up correctly. To do this, go in the editor to the timeline located at the bottom of your screen.
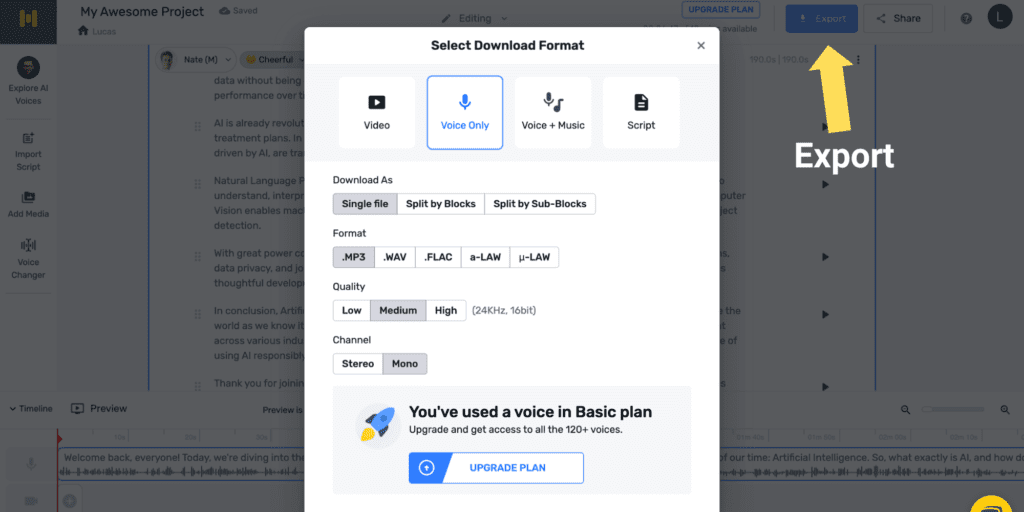
Here, you can listen to the complete AI voice and make any last adjustments. If you’re satisfied with your project, go to ‘Export’ in the top right corner.
Then, select what you would like to export: Video, voice only, voice + music, or script. That’s it, enjoy your AI-generated voice!
Summary
In this article, we discussed the 6 steps of how to make an AI voice in Murf.ai. I hope these steps help you along the way to create your own AI voice.
In short, you sign in to your AI voice generator tool, create a new project, import your text/audio file, make adjustments in the editor, and export it as a file.
Good luck with generating your AI voice!

